 Pin It
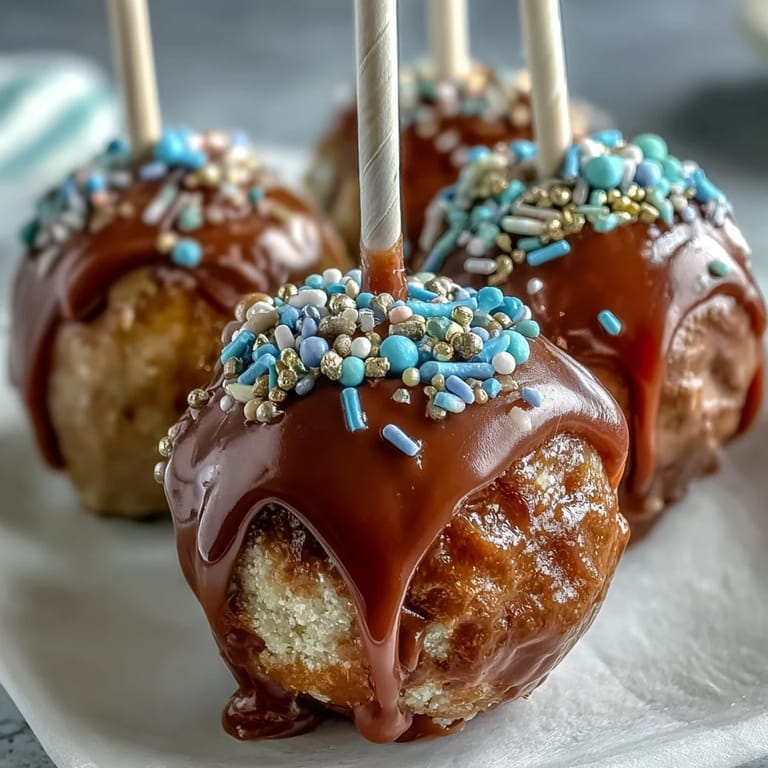
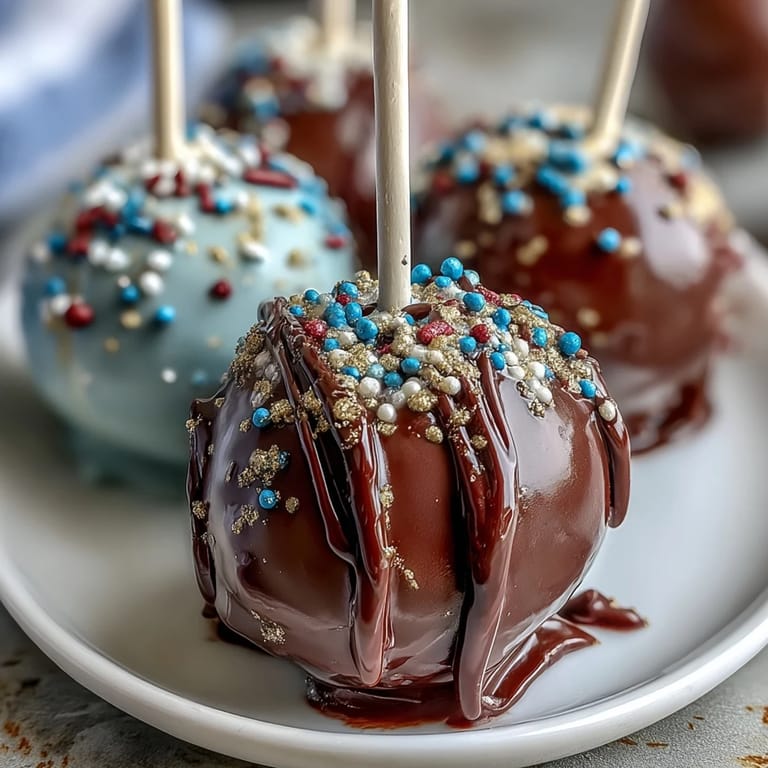
 My sister called me three weeks before graduation asking if I could make something special for her celebration party. She wanted cake, but nothing ordinary—something guests could hold in their hands and admire. That afternoon, while she described her school colors with genuine excitement, I realized cake pops were the answer. Dipping them in her colors and adding gold felt like turning her pride into something edible and shimmering.
I'll never forget watching my sister hand these out at her party. Someone bit into one and the cake crumbled slightly, releasing this wonderful vanilla smell, and suddenly people were asking for the recipe instead of just complimenting the look. That's when I knew they weren't just decoration—they tasted as good as they looked, which somehow made the whole day feel more real.
Ingredients
- Vanilla or chocolate cake mix: Start with a box because it removes guesswork and lets you focus on the fun part—the decorating and flavors you actually control.
- Unsalted butter: Softened means it creams easily, which is the foundation of frosting that tastes genuinely good and not gritty.
- Powdered sugar: This dissolves into the frosting smoothly, unlike granulated sugar which would give you a grainy texture no matter how long you beat it.
- Milk and vanilla extract: These two ingredients are what transform butter and sugar from sweet into something that actually tastes like frosting instead of eating fondant.
- Candy melts in school colors: Regular chocolate seizes easily when dipped, but candy melts stay glossy and smooth because of their cocoa butter replacement.
- Vegetable shortening or coconut oil: A tablespoon or two melted with your candy coating thins it just enough for a smooth finish without making everything taste oily.
- Gold sprinkles or edible glitter: Apply these while the coating is still wet, otherwise they slide right off like they never happened.
- Lollipop sticks: Dipping the end in melted candy before inserting it into the ball keeps it from spinning loose halfway through decorating.
Tired of Takeout? 🥡
Get 10 meals you can make faster than delivery arrives. Seriously.
One email. No spam. Unsubscribe anytime.
Instructions
- Bake and cool your cake:
- Follow the box instructions exactly, then let the cake cool completely at room temperature. Warm cake makes the frosting melt when you mix them together, which creates a greasy mess instead of a mixture that holds its shape.
- Whip the frosting base:
- Beat the softened butter for about two minutes until it's pale and fluffy, then add powdered sugar gradually so it doesn't puff up your kitchen in a white cloud. Keep beating until the texture is light and cloud-like.
- Crumble and combine:
- Break the cooled cake apart with your fingers into small crumbs, then mix in the frosting slowly. You're looking for a texture that barely holds together when you squeeze it—too much frosting makes them weep when dipped.
- Roll into balls:
- Use a tablespoon measure to keep them roughly even in size, roll them between your palms until they're smooth, then refrigerate or freeze them. Cold cake pops don't fall apart when you dip them in hot candy coating.
- Secure the sticks:
- Dip just the tip of each stick into melted candy melts, then push it halfway into each ball. This tiny step prevents the entire pop from spinning off the stick mid-dip.
- Melt your coating colors:
- Microwave candy melts in 20-second bursts, stirring between each one so they melt smoothly and don't get thick or grainy. Add shortening if you want a thinner, glossier coat that sets beautifully.
- Dip with confidence:
- Hold each pop by the stick and dip it quickly into the coating, rotating it gently to coat evenly, then hold it over the bowl for two seconds to let excess drip off. Tap the stick gently against the bowl rim if drips are still forming.
- Sparkle while wet:
- Sprinkle the gold while the coating is still glossy and sticky, otherwise the sprinkles slide off like they're ice skating. Set each pop upright in the Styrofoam block and resist the urge to touch them.
- Let them set completely:
- Wait until the coating hardens fully before moving them, which takes about 30 minutes at room temperature. Patience here means you won't crack the beautiful finish you just created.
 Pin It
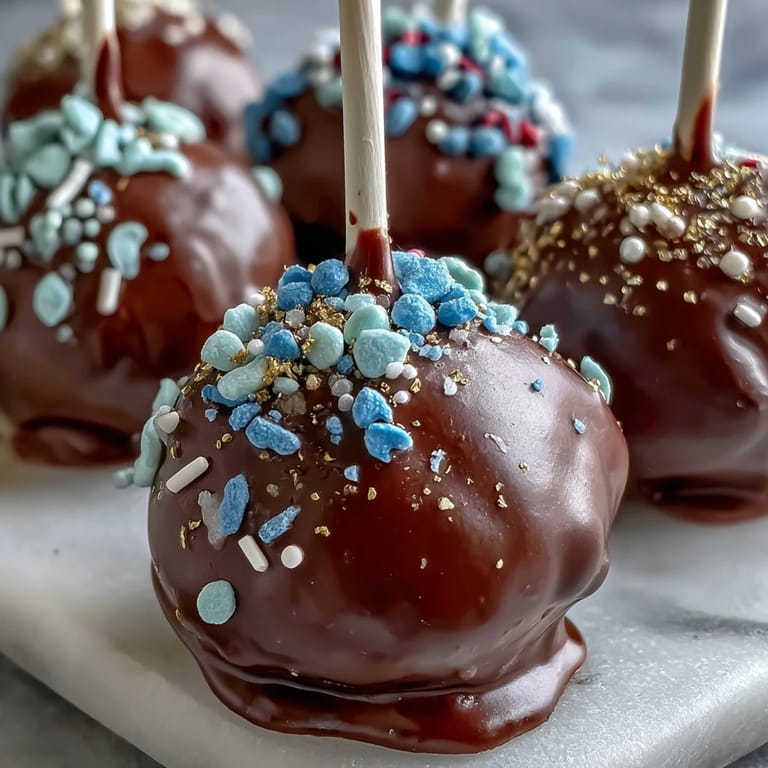
 The moment that stuck with me wasn't during the decorating—it was the next day when my sister texted me a photo from someone's Instagram story showing the cake pops arranged on a table. They'd become part of the memory of her graduation, something people held and shared and remembered. That's when I understood why people make these things for celebrations.
Flavor Combinations That Work
Chocolate cake with vanilla frosting creates a classic combination that feels timeless, while vanilla cake with chocolate frosting goes the other direction with elegance. You could also make half vanilla and half chocolate cake to create more variety without doubling your work. The frosting stays neutral enough that it pairs beautifully with either choice, and the candy coating color is really what matters for making them feel special to the occasion.
Personalizing for Your Event
The beauty of this recipe is that the colors tell the whole story. School colors, team colors, wedding colors—whatever matters to the person you're celebrating becomes edible and visible. I've learned that adding small touches like school ribbons tied around the sticks or using glitter that matches their colors transforms these from pretty cake pops into something that feels made specifically for that moment. Even simple touches make people feel genuinely celebrated.
Storage and Serving Tips
These keep beautifully in an airtight container at room temperature for up to three days, which means you can make them the day before without stress. Refrigerating them extends storage to a week, though the coating may develop condensation if you take them out suddenly from cold into warmth. Gift boxes, small baskets, or even tissue paper-lined containers make them feel special to receive.
- Always store them in an airtight container to prevent the coating from absorbing moisture and becoming sticky.
- If coating gets slightly tacky before serving, pop them back into the fridge for 15 minutes to reset the finish.
- Transport them in a box or carrier with dividers so they don't bump against each other and chip the coating.
 Pin It
 These cake pops became my go-to celebration dessert because they're small enough to feel special but substantial enough that people genuinely enjoy eating them. Whether it's graduation, promotion, or a moment worth marking, this recipe turns cake into something worth remembering.
Recipe Questions & Answers
- → How do I make the cake balls hold together?
Mix the crumbled cake with just enough frosting (about 1/2 to 3/4 cup) until the mixture holds together without being too wet, which helps maintain shape during dipping.
- → Can I use different cake flavors?
Absolutely! Vanilla and chocolate work well, and you can choose any flavor you prefer to match your celebration theme.
- → What is the purpose of chilling the cake balls?
Chilling helps firm up the cake balls, making them easier to dip and preventing them from falling apart during decoration.
- → How do I secure the sticks in the cake pops?
Dip one end of each stick into melted candy melts, then insert halfway into a cake ball. This creates a bond that holds the stick securely.
- → What tips ensure smooth candy melt coating?
Use vegetable shortening or coconut oil when melting candy melts for a smoother texture and more even coating.
- → How should the finished cake pops be stored?
Store in an airtight container at room temperature for up to 3 days or refrigerate for up to a week to maintain freshness.